Mastering the Art of Installing Sam Browne Studs
Mastering the Art of Installing Sam Browne Studs
Are you ready to take your leathercrafting projects to the next level? Sam Browne studs are a timeless favourite for crafters, offering both style and functionality to leather goods like belts, bags, and straps. These classic leather fasteners create a secure and elegant closure, and with a bit of patience and attention to detail, you can install them like a pro.
Whether you're a seasoned leatherworker or just starting out, this step-by-step guide will walk you through everything you need to know about installing Sam Browne studs. We’ll cover the tools you’ll need, detailed steps on attaching them, and some expert tips and tricks to achieve a flawless finish.

What Are Sam Browne Studs?
Before we get started, let's understand what makes Sam Browne studs unique. These fasteners, originally used in military uniforms, are known for their single-button structure that fits into a leather slit or hole to create a secure closure. Today, they are widely used in leathercraft for their minimalistic design and functionality.
Their versatility makes them perfect for items like satchels, wristbands, or even fashion accessories. Sam Browne studs are available in a variety of finishes—brass, steel, or nickel-plated—to suit your design aesthetic.
Tools and Materials You’ll Need
Preparation is half the job. Gather these tools and materials to ensure a smooth process from start to finish.
Tools
- Leather punch (round hole punch or rotary punch)
- Awl (for marking or fine adjustments)
- Screwdriver (flathead or appropriate tool for attaching the stud screw)
- Cutting mat or hard surface (to protect your workspace)
- Mallet or hammer (for reinforcing punctures)
Materials
- Sam Browne studs (ensure they are the correct size for your leather thickness)
- Leather piece (belt, strap, or bag flap)
- Optional but helpful enhancements:
-
- Wax or edge finisher (to tidy up the punch holes)
- Ruler or tape measure for precision measurements
Pro Tip: When purchasing Sam Browne studs, check the specifications carefully to match the length of the stud post with your leather’s thickness. Incorrect sizing can lead to loose fastenings or misalignments.
How to Install Sam Browne Studs Step by Step
Step 1: Measure and Mark the Position of the Stud
Start by deciding where you’d like the stud to sit on your leather piece. Use a ruler and pencil to mark the exact spot. For the best results, ensure the mark aligns with the area where the receiving hole will be positioned.
Pro Tip: If you’re working on straps or belts, test fold your leather to double-check the alignment before proceeding.
Step 2: Punch the Hole for the Stud
Using a leather punch, create a clean hole on the marked position. The hole’s diameter should match the stud’s post for a snug fit.
- If you’re unsure about sizing, punch test holes on a leather scrap first. This ensures accuracy without risking your project.
- Use a mallet or hammer to apply steady, firm pressure if your leather is particularly thick.
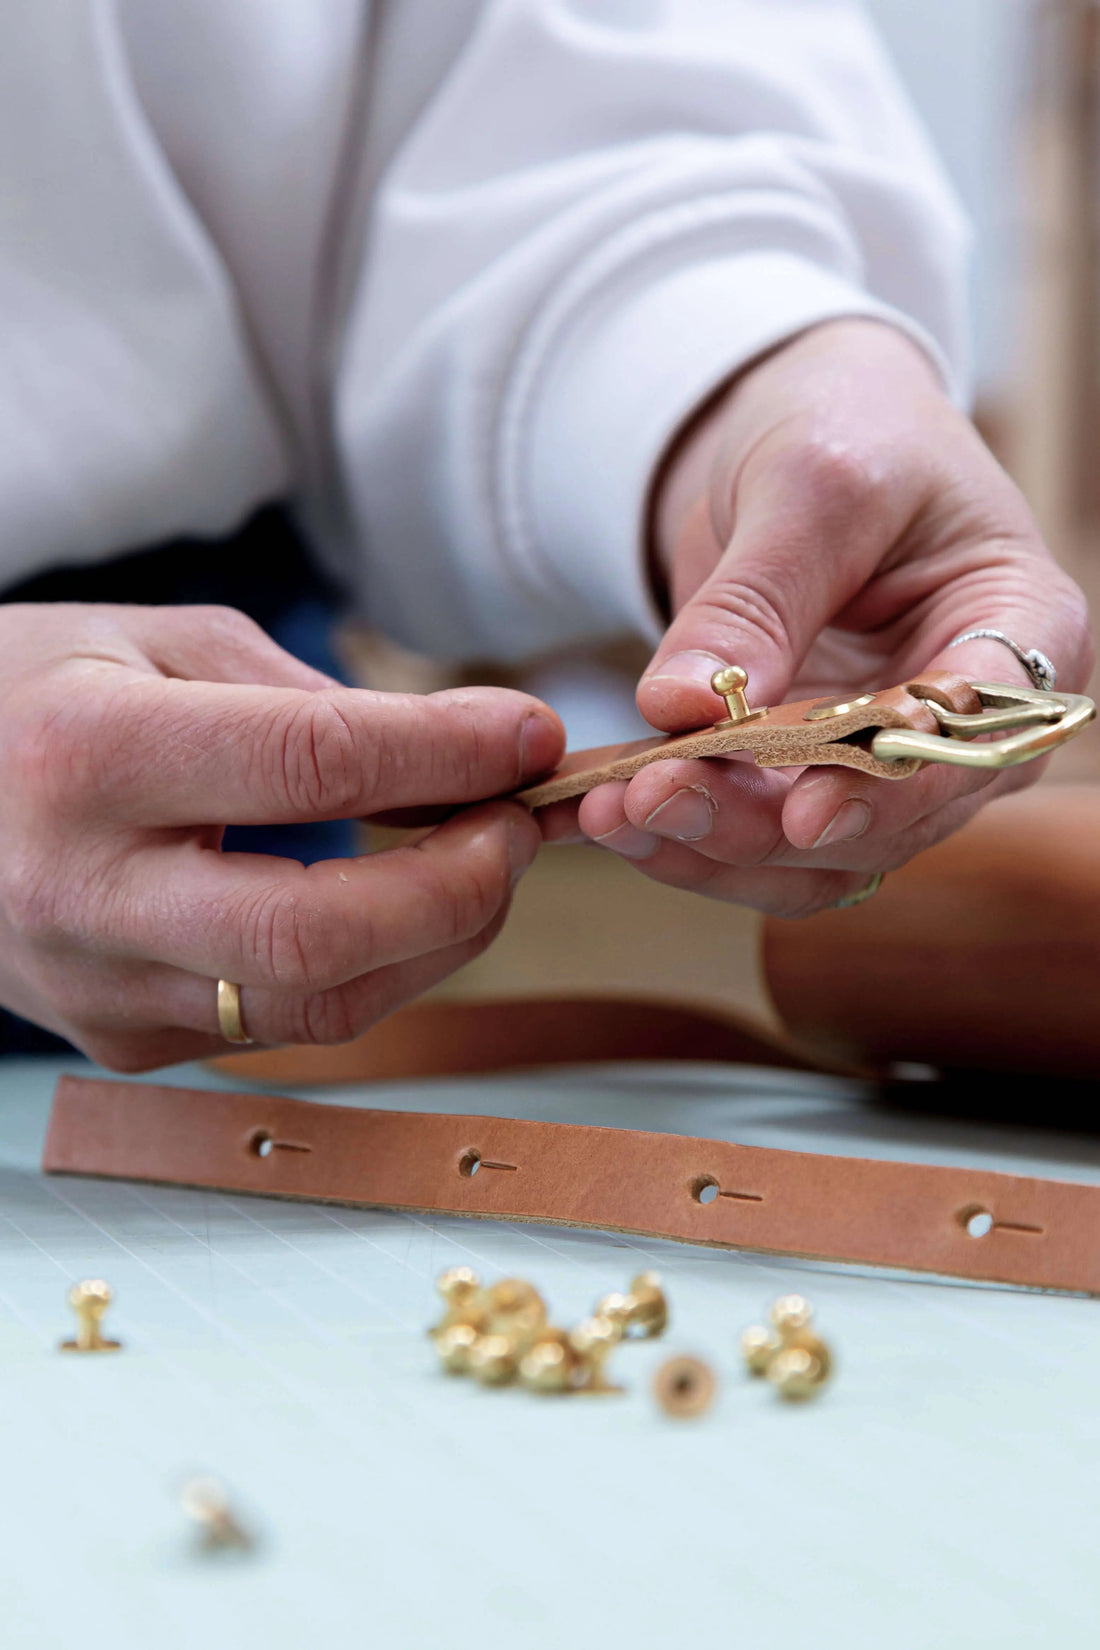
Step 3: Attach the Stud Post
Take the post of your Sam Browne stud and insert it into the hole you’ve made. The flat side of the stud post should sit firmly against the back of the leather.
If your stud requires a separate screw to secure the post, hold the post in place while fastening the screw with a screwdriver. Tighten just enough to secure it without damaging the leather fibres.
Step 4: Punch the Receiving Slit or Hole
Next, measure and mark the section of leather that will loop over the stud and secure it. Using your leather punch or a utility knife, create a slit or circular hole slightly larger than the stud’s button top.
The slit method is perfect for straps or belts, while a circular hole works well for stationary closures like bag flaps.
Step 5: Test the Fastening
Now for the satisfying part—test it out! Carefully loop the leather over the stud button to check the fit. Adjust the slit or hole size if necessary for a smooth connection.
Pro Tip: If the fastening feels too tight or stiff, use an awl to gently widen the slit or hole. Avoid overcutting, as it could loosen the fit over time.
Step 6: Finish the Edges (Optional)
To give your work a polished look, apply edge finisher or wax to neaten the punched holes and slits. This step not only improves aesthetics but also enhances durability by preventing fraying.
Expert Tips and Tricks for a Flawless Finish
Here are some additional insights to ensure your Sam Browne stud installations are flawless every time.
- Practice on Scraps
If you’re new to leathercraft or Sam Browne studs, practice the process with scrap leather to build confidence before working on your final piece.
- Work with Quality Materials
Inferior leather or hardware can lead to unsatisfactory results. Invest in high-quality leather and studs for a professional finish.
- Use a Template for Precision
If you’re installing multiple studs, create a template to ensure accurate positioning and consistent alignment across your project.
- Keep Tools Sharp and Clean
A clean leather punch and well-maintained awl make cutting holes more accurate and prevent damage to the leather.
- Double-Check Measurements
Measure twice, punch once. A quick second check can save you from irreversible mistakes.
- Harness the Power of Wax
Wax applied to edges and slits softens the leather for easier attachment and adds a smooth touch.
The Beauty of Sam Browne Studs
Installing Sam Browne studs adds a stylish and functional element to your leather creations. With practice, you’ll master the technique and unlock endless possibilities to personalise your designs. Whether you’re enhancing a satchel or crafting a sleek belt, these fasteners can elevate your project’s craftsmanship.
Remember, leathercraft is as much about patience and precision as it is about creativity. Take your time, enjoy the process, and don’t hesitate to experiment!
----------------
Original article written by Becky Cocker of British Leather Supplies. Explore our site to find more resources about the history, uses and installation methods for Sam Browne Leather Studs. Visit our shop to find quality solid brass leather fittings.